
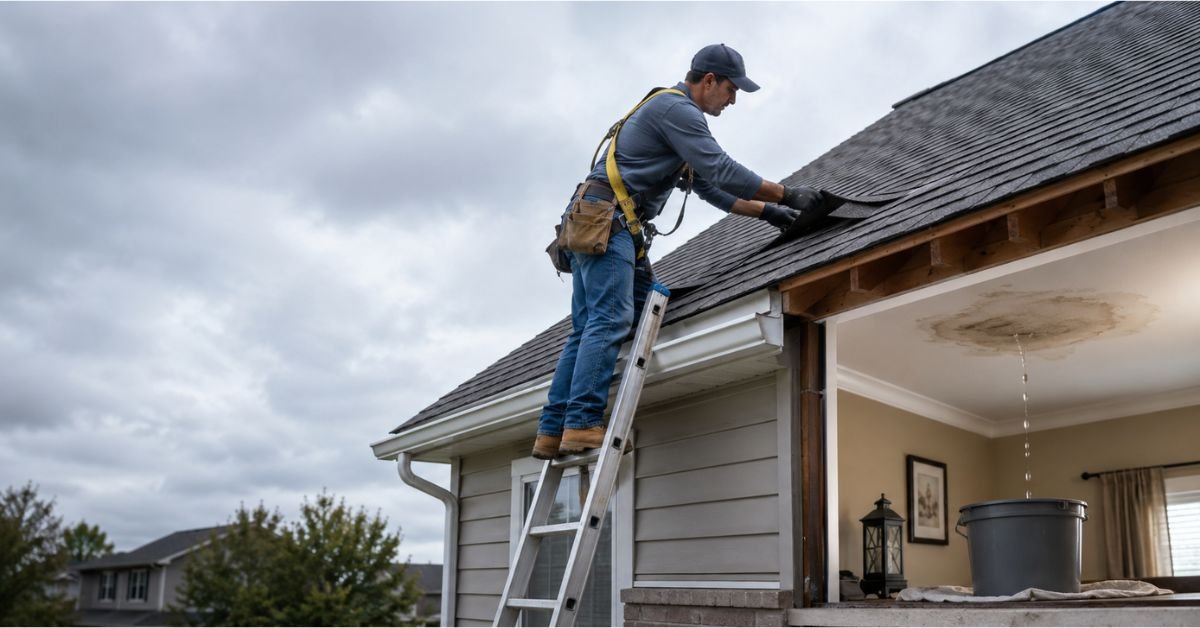
f you want to know How to Fix a Roof Leak Yourself, you have come to the right place. A leaking roof can feel overwhelming. One rainy afternoon you notice a brown stain on your ceiling, and before you know it, there is a bucket on the kitchen floor and a growing sense of dread about repair bills. The good news? Many roof leaks are smaller than they look, and with the right guidance, a motivated homeowner can handle them safely and effectively.
This guide will walk you through everything you need — from tracking down the exact source of the problem to patching it up correctly. Knowing how to fix roof leak yourself is one of the most valuable home maintenance skills you can have. It saves money, prevents long-term damage, and gives you real confidence in maintaining your home. Whether you have a missing shingle, a cracked piece of flashing, or a slow drip around a chimney, this article covers the full process in plain, simple language. Every step is explained the way a knowledgeable neighbor would explain it — clearly, honestly, and without confusing jargon.
If you have been searching for ways to how to fix roof leak yourself, you are already ahead of most homeowners who simply ignore early warning signs.
Water is patient. A small drip that you ignore today can quietly rot your roof deck, soak your insulation, and create the perfect conditions for mold over the next few months. According to the U.S. Environmental Protection Agency (EPA), mold can begin growing on damp building materials in as little as 24 to 48 hours.
The financial stakes are real, too. A minor shingle repair might cost $150 to $400 if you hire out. But if you delay and the leak spreads to the roof deck or causes ceiling collapse, you could be looking at $3,000 to $10,000 or more. Early action is always the cheapest action.
Beyond cost, a leaking roof puts your family’s health at risk. Mold spores in the air trigger allergies, asthma, and respiratory problems. Wet insulation loses all its heat-saving properties, driving up energy bills. And if water reaches your electrical wiring, you have a fire and shock hazard on your hands.
In short: a leaking roof is never just a cosmetic problem. Treat it seriously, and treat it quickly.
Before you start climbing ladders, it helps to understand where leaks typically come from. Water rarely enters through a wide-open hole. Instead, it sneaks in through small failures that have built up over time.
are the most common culprit. Wind pulls them up, hail cracks them, and age makes them curl and break apart. Once a shingle is gone, the wood underneath is exposed.
is the second most frequent cause. Flashing is the thin metal (usually aluminum or galvanized steel) that seals the gaps where your roof meets a chimney, vent pipe, skylight, or wall. When flashing corrodes, bends, or pulls away, water pours straight in.
back water up under the bottom row of shingles — a problem especially common during heavy autumn rains.
around vent pipes and roof penetrations dries out and shrinks over time, opening hairline gaps.
form in cold climates when heat escapes through the roof, melts snow at the top, and then the meltwater refreezes near the cold eaves. That ice forces water back up under the shingles.
leak when their surrounding seals deteriorate or when the chimney mortar cracks and allows water to travel down into the attic.
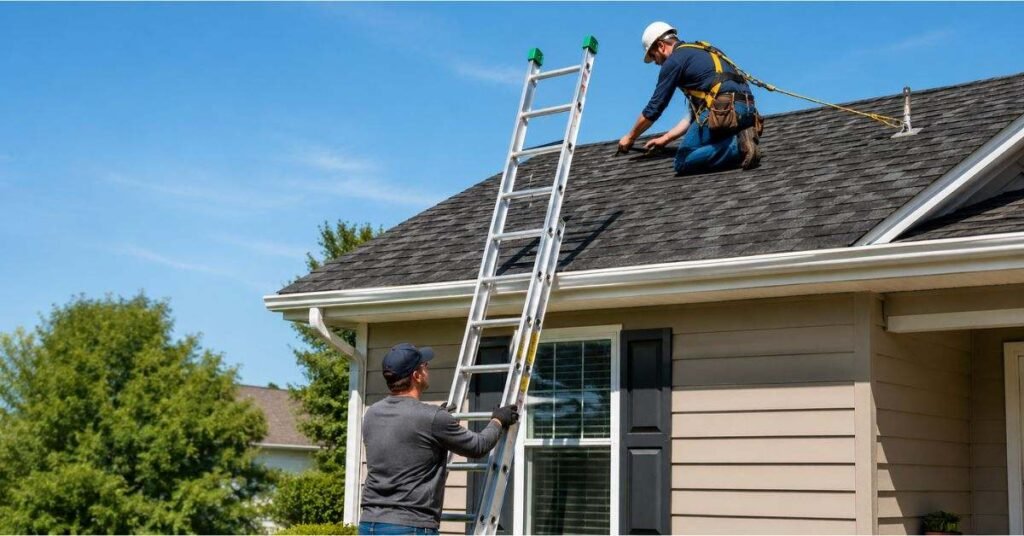
Working on a roof is genuinely dangerous. Falls from roofs are one of the leading causes of serious home DIY injuries. Before you attempt any repair, follow these safety rules without exception.
Never work on a wet roof. Wet shingles are as slippery as ice.
Use a sturdy extension ladder rated for your weight plus tools. Set it on firm, level ground and extend it at least three feet above the roofline.
Wear rubber-soled shoes with good grip — soft-soled sneakers or work boots are ideal.
Use a safety harness on any roof steeper than a 4:12 pitch (meaning the roof rises 4 inches for every 12 inches of horizontal run).
Work with a partner who can hold the ladder and call for help if needed.
Avoid power lines. If your repair area is near overhead electrical lines, call your utility company first.
Check the weather. Plan your repair for a dry, calm day with no rain forecast for 24 hours.
For steep or complex roofs, honestly consider calling a licensed roofing contractor. Some repairs are genuinely a job for professionals. That said, when conditions are safe, learning how to fix roof leak yourself on simpler repairs is completely achievable.
Finding the actual entry point is often harder than the repair itself. Water travels. It can enter at one spot, run along a rafter for several feet, and then drip down onto your ceiling somewhere completely different. Never assume the leak is directly above the water stain.
- Water stains (yellow-brown rings) on the wood
- Dark wet spots on rafters or the roof deck
- Daylight visible through gaps in the roof boards
- Damp or matted insulation
Follow the wet trail upward and toward the roof peak. Mark the spot with a piece of chalk or tape so you can find it from outside.
If you cannot find it during rain, take a garden hose to the roof with a helper inside the attic. Soak one section at a time — start low and work upward — while your helper watches for drips. This slow, methodical approach almost always works.
- The area uphill from the interior stain
- All flashing (chimney, vents, valleys, walls)
- Any shingles that look lifted, cracked, curled, or missing
- Rubber boots around pipe penetrations
- The valleys where two roof sections meet
Take photos of everything suspicious. You will refer to them during the repair.
Having the right supplies ready before you climb up saves time and prevents dangerous trips up and down the ladder. When you decide to how to fix roof leak yourself, these are the items you will reach for most.
| Tool / Material | Purpose | Approximate Cost (2026) |
|---|---|---|
| Roofing cement (tube or can) | Seal cracks, gaps, flashing edges | $8–$15 |
| Self-adhesive flashing tape | Quick seal on flashing and seams | $12–$25 |
| Replacement shingles | Replace damaged or missing ones | $30–$80 per bundle |
| Roofing nails (1¾” galvanized) | Secure new shingles | $5–$10 per lb |
| Pry bar / flat bar | Remove old nails and shingles | $10–$25 |
| Caulking gun | Apply roofing caulk precisely | $8–$20 |
| Utility knife | Trim shingles and membrane | $10–$20 |
| Putty knife / trowel | Spread roofing cement | $5–$12 |
| Stiff-bristle brush | Clean surfaces before sealing | $5–$10 |
| Safety harness | Prevent falls on steep roofs | $40–$120 |
| Heavy-duty tarp | Emergency cover while waiting | $20–$50 |
This is the repair most homeowners will do at some point. Asphalt shingles are designed to be replaced one at a time.
Lift the edges of the surrounding shingles gently. In warm weather they are more flexible; in cold weather, work slowly to avoid cracking.
Remove the nails from the damaged shingle using your pry bar.
Slide out the old shingle and discard it.
Slide the new shingle into position, lining it up with the shingles on either side.
Nail it down with four roofing nails — one at each corner, positioned just below the tar strip.
Apply a small dab of roofing cement under the edges of the overlapping shingles above and press them down firmly.
Match your replacement shingles to your existing ones as closely as possible. Bring a piece of the old shingle to the hardware store to match the color and style.
Flashing failures are responsible for a large share of persistent leaks, especially around chimneys and vent pipes.
Remove old sealant around the flashing using your putty knife or a wire brush.
Check if the metal itself is damaged. If the flashing is corroded, bent, or has holes, replace it entirely. New step flashing and counter-flashing are available at any hardware store.
If only the sealant has failed, clean the area thoroughly, let it dry, and apply a fresh bead of quality roofing caulk or urethane sealant. Press it firmly into the gap.
For chimney flashing, apply roofing cement along the base where the flashing meets the chimney and where it meets the shingles. Some homeowners also embed a strip of self-adhesive flashing tape for extra insurance.
Every pipe that pokes through your roof (plumbing vents, gas flues) has a rubber “boot” around it. These boots crack and deteriorate over time.
Pull back any shingles covering the top edge of the boot.
Remove the old boot by pulling out its nails.
Slide a new pipe boot of the correct size down over the pipe.
Nail the base flange under the surrounding shingles and over the lower shingles.
Apply roofing cement under the shingles that overlap the top of the new boot.
New pipe boots cost $10–$30 and replacing one is usually a 30-minute job. It is one of the most satisfying repairs because it completely eliminates a frustrating recurring drip.
If water is coming in right now and you cannot make a permanent repair immediately, these steps will reduce the damage until you can do the full job.
Use a heavy-duty polyethylene tarp and weight the edges with wooden boards or sandbags. Do not nail through the tarp into good areas of the roof — use the boards to hold it down.
If you can see exactly where water is entering, spread a thick layer of roofing cement over the gap from below. Push a piece of plywood against it for support. This is a very temporary fix but it buys you time.
over small cracks on flashing or around penetrations. Products like Grace Ice & Water Shield or similar self-adhesive membranes will stick even in damp conditions and hold for weeks.
Not all roofs are the same, and different materials need different approaches.
| Roof Type | Common Leak Spots | DIY Difficulty | Typical Repair Cost (DIY) |
|---|---|---|---|
| Asphalt shingles | Missing/cracked shingles, flashing | Easy–Moderate | $50–$300 |
| Metal roofing | Fastener rust, seam gaps | Moderate | $80–$350 |
| Flat (EPDM/TPO) | Membrane splits, ponding areas | Moderate | $100–$400 |
| Clay/concrete tile | Cracked or slipped tiles | Moderate–Hard | $150–$500 |
| Wood shake | Split or warped shakes | Moderate–Hard | $200–$600 |
| Slate | Cracked or slipped slates | Hard | $250–$800 |
For tile, slate, and complex flat roofs, consider having a professional evaluate the damage first. Walking on tile roofs can crack more tiles, and slate is expensive and fragile.
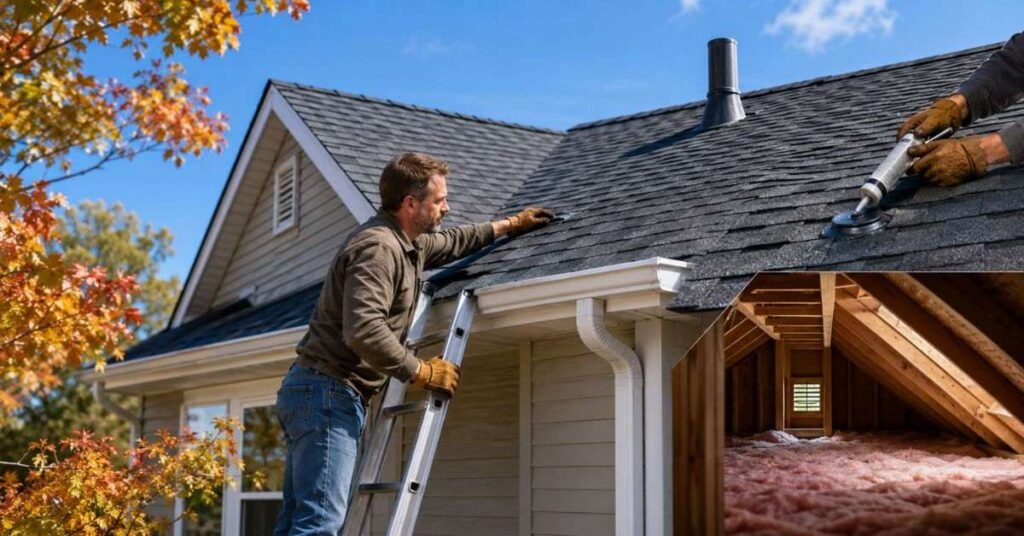
The best repair is the one you never have to make. Learning how to fix roof leak yourself is useful, but consistent maintenance prevents most leaks from happening in the first place.
Do these checks at least twice a year — once in spring and once in late autumn before winter sets in:
Blocked gutters are a major cause of water backing up under shingles.
Branches scrape and wear away shingles and drop debris that holds moisture.
Inspect all flashing visually for rust, lifting, or gaps.
Re-caulk anything that looks dry, cracked, or pulling away.
These hold moisture and accelerate shingle deterioration. Treat with a zinc-sulfate solution or replace affected shingles.
Inspect the attic after heavy rain for any new wet spots.
Schedule a professional inspection every three to five years, especially if your roof is over fifteen years old.
The Insurance Information Institute notes that homeowners who maintain their roofs are more likely to have storm damage claims approved because there is proof the roof was in good condition before the storm.
Knowing how to fix roof leak yourself is empowering, but it is equally important to recognize when a job is beyond a sensible DIY scope.
- The leak covers a large area or multiple sections
- Your roof deck (the plywood or OSB under the shingles) is soft, spongy, or rotting
- You find widespread mold in the attic
- The pitch (steepness) is so extreme you cannot safely stand on it
- The leak involves structural rafters or trusses
- You have attempted a repair more than once and the leak persists
- You need documentation for an insurance claim
Getting two or three written quotes from licensed, insured contractors is always a smart idea. Check contractor reviews on the Better Business Bureau website before you hire.
A qualified roofer can also identify underlying issues — like inadequate ventilation causing ice dams, or a failing underlayment — that would be very hard for a homeowner to diagnose alone.
This is one of the most common questions homeowners ask, and the answer is: it depends on the cause.
Most standard homeowners insurance policies cover sudden and accidental damage — for example, a storm that blows off shingles, hail that cracks them, or a tree that falls on the roof. In these cases, your insurer will typically pay for repairs minus your deductible.
What is generally not covered:
- Normal wear and tear or aging
- Leaks caused by neglect or lack of maintenance
- Gradual damage that the homeowner should have caught and repaired
If you file a claim, document everything thoroughly. Take photographs of all damage before you make any temporary repairs. Keep your repair receipts. Have the damage assessed by both your insurer and an independent contractor.
Here are the questions homeowners most commonly ask when they decide to how to fix roof leak yourself for the first time.
A: You can apply a temporary seal from inside the attic with roofing cement or waterproof tape, but you must make a proper exterior repair as soon as possible — interior patches do not hold long-term.
A: A properly applied shingle replacement or flashing repair can last five to ten years. Roofing cement patches typically last one to three years before needing re-application.
A: Polyurethane roofing sealant or a quality roofing cement (in a caulking-gun tube) works well for most small repairs. For flashing, self-adhesive butyl tape is excellent. Always choose a product rated for outdoor roofing use.
A: Condensation drips tend to be diffuse and appear on cold surfaces throughout the attic, especially in winter. A roof leak creates a focused wet trail that traces back to a specific entry point — usually visible as a dark wet line along a rafter.
A: On a dry day with proper footwear and safety precautions, most asphalt shingle roofs are safe to walk on. Tile, slate, and very steep roofs are more dangerous. Always use a harness on steep pitches and never walk on wet roofing.

A roof leak is not something to put off until next month. Every week of delay means more water, more damage, and a bigger repair bill waiting at the other end.
The encouraging truth is that the majority of residential roof leaks have straightforward causes — a damaged shingle, a failed seal, a cracked piece of flashing — and a homeowner with basic tools, careful preparation, and a dry weekend afternoon can address them confidently. Understanding how to fix roof leak yourself is about more than saving money; it is about knowing your home, catching problems early, and keeping your family safe and dry.
Use this guide as your roadmap. Start with a thorough inspection, gather your materials, follow the step-by-step repair process for your specific leak type, and then put a regular maintenance routine in place to prevent the next one.
If at any point the job looks bigger or more dangerous than you expected, do not hesitate to call a licensed professional. The best outcome is a dry, safe home — however you get there.